Introduction to How to Apply Lash Extensions

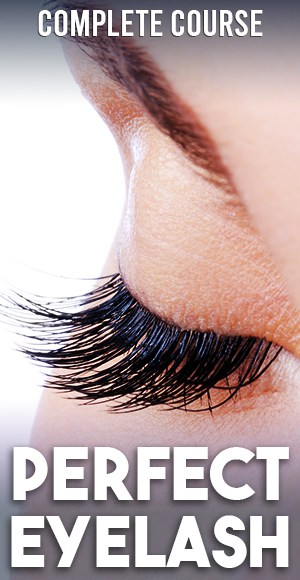
Eyelash extensions have revolutionized the beauty industry, offering a way to achieve fuller, longer lashes without the daily hassle of mascara. Understanding eyelash extensions is key to appreciating their allure and functionality. These extensions are individual fibers—synthetic, silk, or mink—attached to each natural lash to enhance eye appearance.
Understanding Eyelash Extensions
Eyelash extensions are not to be confused with temporary lash strips. They are semi-permanent fibers that are attached to your natural lashes using a special adhesive. This process can transform the look of your eyes dramatically, making your lashes appear longer, fuller, and darker.
Types of Lash Extensions: Synthetic, Silk, Mink
- Synthetic Lashes: These are made from a polished, acrylic material and are the firmest/sturdiest of the three. They offer a more dramatic look.
- Silk Lashes: These are mid-weight type of lash and are finer and more flexible than the synthetic type. They are a good middle-ground between synthetic and mink.
- Mink Lashes: Known for their natural look and lightweight feel, mink lashes are premium and mimic the look and feel of human lashes.
Benefits of Choosing Lash Extensions
Opting for eyelash extensions can offer several benefits:
- Time-saving: They eliminate the need for daily mascara application.
- Customizable: You can choose the length, curl, and type of lash for a personalized look.
- Natural Appearance: Especially with silk and mink, they blend seamlessly with your natural lashes.
- Long-lasting: Properly applied and cared for, they can last for several weeks.
In the next section, we’ll delve into how to prepare for lash extension application, ensuring a smooth and successful enhancement of your natural beauty. Stay tuned to learn the essential steps and tips for how to apply lash extensions effectively.
Preparing for Lash Extension Application
Before diving into how to apply lash extensions, it’s crucial to prepare your natural lashes and gather the necessary tools. This preparation ensures a smooth application process and long-lasting results.
Assessing Your Natural Lashes
- Examine Lash Health: Check your natural lashes for strength and length. Weak or damaged lashes may not support heavy extensions well.
- Consider Lash Length: If your natural lashes are short, opt for lighter, shorter extensions to avoid damage.
- Understand Your Lash Cycle: Familiarize yourself with your eyelash growth cycle to anticipate how long extensions might last.
Selecting the Right Extensions
- Length: Choose a length that complements your natural lashes. Longer isn’t always better; it should be proportionate.
- Thickness: Thicker lashes create a more dramatic look, but they shouldn’t be too heavy for your natural lashes.
- Color: Match the color to your natural lashes for a seamless look, or experiment with colors for a bold statement.
Cleaning and Priming Your Natural Lashes
- Remove Makeup: Use an oil-free makeup remover to clean your lashes. This ensures that the extensions adhere properly.
- Clean Lashes Thoroughly: Any residue can interfere with the adhesive. A gentle, lash-friendly cleanser is recommended.
- Dry Lashes Completely: Extensions should be applied to dry lashes for the best adherence.
Tools and Materials Needed for Application
- High-Quality Lash Adhesive: Choose an adhesive without harmful chemicals like formaldehyde. Cosmetic Ingredient Review offers insights into safe adhesives.
- Tweezers: A set of precision tweezers for picking up and placing the lashes.
- Lash Extensions: Select your preferred type (synthetic, silk, mink).
- Lash Primer: To prep the lashes and enhance adhesive bond.
- Under Eye Gel Pads: To protect the under-eye area and keep lower lashes out of the way.
By following these preparation steps, you’re setting the stage for a successful lash extension application. In the next part, we’ll explore the actual process of how to apply lash extensions, focusing on technique and precision for the best results.
Step-by-Step Application Process

The process of how to apply lash extensions requires precision and patience. Here’s a step-by-step guide to ensure a flawless application:
Step 1: Isolating the Natural Lash
- Use a Lash Separator: Carefully separate each natural lash using a fine-tip lash separator. This step is crucial for precise application.
- Work One Lash at a Time: Focus on one lash at a time to ensure each extension is properly aligned and adhered.
Step 2: Picking and Dipping the Extension
- Select the Right Extension: Based on your earlier assessment, pick an extension that matches the desired length and thickness.
- Dip in Adhesive: Gently dip the base of the extension in lash adhesive. Ensure you’re using a high-quality, safe adhesive, as recommended by Cosmetic Ingredient Review.
- Minimal Glue: Use just enough glue to cover the base without over-saturating.
Step 3: Applying the Extension to the Natural Lash
- Angle of Application: Hold the extension at a 90-degree angle to the natural lash.
- Close Proximity: Place the extension as close to the lash line as possible without touching the eyelid.
- Secure the Extension: Gently press the extension onto the natural lash. It should sit comfortably without any twisting.
Step 4: Setting and Drying the Lashes
- Allow Time to Set: Give the adhesive a few moments to dry and set the lash in place.
- Avoid Touching: Refrain from touching or brushing the lashes immediately after application.
- Dry Naturally: Let the lashes air dry or use a lash fan for quicker setting.
By following these steps, you can achieve a professional-looking lash extension application. For more insights and tips on enhancing your makeup skills, check out this informative post on Effortless Beauty Tips for Every Occasion from Makeupflix. Remember, practice makes perfect, and patience is key in mastering how to apply lash extensions. In the next part, we’ll explore how to achieve a natural look with your lash extensions, ensuring they blend seamlessly with your natural lashes.
Achieving a Natural Look
When learning how to apply lash extensions, achieving a natural and balanced look is often the ultimate goal. Here are some strategies to ensure your lash extensions look as natural as possible:
Placement Strategies for a Natural Effect
- Start at the Outer Corner: Begin applying extensions at the outer corner of the eye, gradually working inwards.
- Vary Placement: Avoid placing extensions in a uniform line. Natural lashes are irregular, so mimic this pattern.
- Focus on Sparse Areas: Pay extra attention to areas where your natural lashes are sparser to create a fuller, more natural look.
Blending Different Lengths and Thicknesses
- Mix Lengths: Use a mix of different lengths, with longer lashes towards the outer corner of the eye and shorter ones near the inner corner.
- Consider Lash Thickness: Thicker lashes add drama, but too many can look unnatural. Balance thicker lashes with finer ones.
- Layering: Apply some lashes on top of others for a multi-dimensional effect, enhancing the natural look.
Tips for Symmetry and Balance
- Check for Symmetry: Regularly step back and check that both eyes are symmetrical in terms of length and volume.
- Adjust as Needed: Don’t hesitate to remove and reapply any lashes that disrupt the symmetry or natural look.
- Final Inspection: Once all lashes are applied, look at the overall effect and make any necessary adjustments for a balanced appearance.
By following these tips, you can ensure your lash extensions enhance your natural beauty without looking overdone. Remember, the key to a natural look with lash extensions is in the details and subtleties of application. In the next section, we’ll discuss the important aspects of aftercare and maintenance to keep your lash extensions looking their best.
Aftercare and Maintenance

Proper aftercare and maintenance are crucial for maximizing the lifespan of your lash extensions. Here’s how to care for them after mastering how to apply lash extensions:
Do’s and Don’ts Post-Application
- Do Avoid Water for 24 Hours: Keep your lashes dry for the first 24 hours to allow the adhesive to set completely.
- Don’t Use Oil-Based Products: Oil can weaken the bond of the lash adhesive. Opt for oil-free cleansers and makeup removers.
- Do Sleep on Your Back: This helps avoid crushing your lashes against the pillow.
- Don’t Rub Your Eyes: Rubbing can loosen or damage the extensions.
Cleaning and Brushing Techniques
- Use a Lash Cleanser: Invest in a gentle, lash-friendly cleanser. The International Association of Lash Artists offers professional tips for lash extension care.
- Gentle Brushing: Use a clean, soft-bristled lash brush to gently comb your lashes daily.
- Pat Dry: After cleansing, pat your lashes dry gently with a lint-free towel. Avoid rubbing or pulling.
When to Schedule Refills
- Monitor Lash Growth: As your natural lashes grow and shed, your extensions will too. Keep an eye on the fullness and length.
- Typical Refill Schedule: Most people need refills every 2-4 weeks, but this can vary based on your natural lash growth cycle and how well you care for your extensions.
- Consult a Professional: If you’re unsure about when to get refills, consult a professional lash technician for advice.
By following these aftercare and maintenance tips, you can enjoy beautiful, long-lasting lash extensions. Remember, the longevity of your extensions largely depends on how well you care for them post-application. In the final part of our guide, we’ll explore common mistakes and solutions in the process of how to apply lash extensions.
Common Mistakes and Solutions
Even with a thorough understanding of how to apply lash extensions, it’s common to encounter challenges. Here’s how to address some typical issues:
Addressing Application Challenges
- Uneven Lengths: If extensions appear uneven, reassess and adjust using varying lengths to achieve a more natural look.
- Excessive Glue Usage: Too much adhesive can lead to clumping. Use just enough glue to cover the base of the extension.
- Lashes Falling Out Prematurely: This could be due to improper application or aftercare. Ensure you’re following all the recommended steps.
Troubleshooting Common Issues
- Irritation or Discomfort: If you experience any discomfort, it could be due to the glue or improper placement. Consult a professional, and consider using a different adhesive, like those recommended by Cosmetic Ingredient Review.
- Difficulty in Isolating Lashes: Use a high-quality, fine-tip tool for better precision.
- Lashes Not Lasting: Ensure you’re using the right type of lash for your natural lashes and following proper aftercare.
Professional vs. DIY Application

- DIY Benefits: Applying lash extensions yourself can be cost-effective and convenient.
- Professional Advantages: A professional lash technician can provide a more precise and potentially longer-lasting application. They can also offer customized solutions for your specific lash type.
- Making the Choice: If you’re new to lash extensions, starting with a professional application can be beneficial. As you become more comfortable with the process, you might explore DIY options.
By understanding these common mistakes and solutions, you can enhance your skills in how to apply lash extensions. For additional learning resources, consider exploring Makeupflix, a streaming course makeup platform, which offers detailed tutorials and professional tips. Remember, practice and patience are key, and don’t hesitate to seek professional advice if needed. With the right approach, you can achieve beautiful, long-lasting lash extensions that enhance your natural beauty.


