Introduction to Halo Eyes

Halo eyes, a captivating eye makeup trend, have been mesmerizing beauty enthusiasts and makeup artists alike. This technique, known for its radiant, halo-like effect around the eyes, has gained immense popularity for its ability to create a stunning, yet wearable look.
Definition and Popularity
Halo eyes involve applying a darker shade of eyeshadow around the perimeter of the eye and a contrasting, lighter shade in the center of the lid. This creates an alluring contrast, highlighting the eyes and giving them a luminous, halo-like appearance. The popularity of this technique can be attributed to its versatility – it’s suitable for both day and night looks and can be adapted to any eye shape or color.
Brief Overview of Trends and Techniques
The beauty of halo eyes lies in their adaptability. From subtle, natural looks using neutral tones to bold, dramatic styles with vibrant colors, the possibilities are endless. The key is in the blending – ensuring a seamless transition between the shades. Makeup enthusiasts often turn to high-quality eyeshadow palettes, like those found at Sephora, to achieve the perfect blend. Additionally, incorporating eye shadow techniques such as smudging and layering can elevate the overall effect, making halo eyes a staple in modern makeup artistry.
The Basics of Halo Eye Makeup
Creating the perfect halo eyes look requires a blend of the right tools, products, and technique. This section will guide you through the essentials needed and provide a step-by-step approach to mastering this stunning eye makeup style.
Essential Tools and Products
To begin, you’ll need a few key items:
- Eyeshadow Primer: Essential for long-lasting wear and enhanced color payoff.
- Eyeshadow Palette: Choose a palette with both light and dark shades. For a versatile option, consider palettes from Sephora.
- Blending Brushes: A must for seamless blending of colors.
- Flat Shader Brush: For precise application of the central lighter shade.
- Eyeliner and Mascara: To define and complete the look.
Step-by-Step Guide to Creating the Halo Eye Look

- Prime Your Lids: Apply eyeshadow primer to ensure your makeup stays put all day.
- Apply the Transition Shade: Choose a mid-tone shade and blend it into the crease as a transition color.
- Darken the Inner and Outer Corners: Using a darker shade, apply it to the inner and outer corners of your eyes, leaving the center of the lid bare.
- Add the Halo: Pat a lighter, shimmering shade onto the center of your lid. This is the key feature of halo eyes.
- Blend for Seamless Transition: Carefully blend the edges where the dark and light shades meet to create a smooth, halo effect.
- Define with Eyeliner and Mascara: Apply eyeliner and mascara to define your eyes. For a more dramatic effect, consider false lashes.
Tips for Beginners
- Start Light: It’s easier to build up color than to remove excess. Start with a light hand and gradually intensify.
- Practice Blending: The beauty of halo eyes lies in the blend. Practice makes perfect!
- Experiment with Colors: Don’t be afraid to experiment with different color combinations. Halo eyes are versatile and can be adapted to any look.
By following these steps and tips, even beginners can master the art of creating stunning halo eyes. Remember, the key is in the blend and the contrast between light and dark shades, so take your time to perfect your technique.
Advanced Techniques and Variations
Once you’ve mastered the basics of creating halo eyes, it’s time to explore more advanced techniques and variations. This part of the article will delve into experimenting with different colors and textures, incorporating glitter and shimmer, and adapting the halo eye look for various occasions.
Experimenting with Colors and Textures

- Mix and Match Colors: Don’t limit yourself to traditional color schemes. Try unexpected combinations like pastels with deep hues or metallics with mattes for a unique look.
- Play with Textures: Combine different textures, such as matte, satin, and metallic, within the same look. This adds depth and dimension to your halo eyes.
- Seasonal Inspiration: Draw inspiration from the seasons. Use warm, earthy tones in autumn and bright, vibrant shades in summer.
Incorporating Glitter and Shimmer
- Center of Attention: Apply a touch of glitter or shimmer to the center of the lid to enhance the halo effect. This draws more attention to the eyes and adds a festive touch.
- Glitter Liner: For a subtle sparkle, use a glitter eyeliner along the lash line or in the inner corners of the eyes.
- Balancing Act: When using glitter, keep the rest of your makeup more subdued to let your eyes be the star of the show.
Creating Different Styles of Halo Eyes for Various Occasions
- Daytime Chic: For a daytime look, stick to softer, lighter shades with a subtle shimmer.
- Evening Glamour: Amp up the drama for evening events with darker shades and bold glitter.
- Special Events: Tailor your halo eyes to special events. For a wedding, opt for romantic pinks and golds, while a holiday party might call for bold reds and greens.
By experimenting with these advanced techniques and variations, you can adapt the halo eyes style to fit any occasion or mood. The key is to have fun with your makeup and express your personal style. For additional tips on enhancing your eye makeup, check out this insightful guide on achieving flawless and stunning eye makeup, which can complement your halo eyes technique. Whether it’s a subtle daytime look or a bold evening creation, halo eyes are a versatile and striking choice.
Common Mistakes and Solutions
Mastering the halo eyes look can be challenging, and it’s common to encounter a few hiccups along the way. This section addresses some typical mistakes and offers solutions to enhance and correct your halo eye makeup.
Troubleshooting Common Issues
- Uneven Blending: If the eyeshadow appears patchy or uneven, the key is to blend, blend, blend! Use a clean, fluffy blending brush to gently smooth out the edges.
- Overpowering Dark Shades: If the darker shades dominate, lighten the center of the lid by adding more of the lighter, shimmering shade. This will help maintain the halo effect.
- Fading or Creasing Eyeshadow: To prevent your eyeshadow from fading or creasing throughout the day, make sure to use a quality eyeshadow primer before application.
How to Enhance and Correct the Halo Eye Look
- Intensify the Halo: For a more pronounced halo effect, apply a dab of concealer on the center of the lid before adding the lighter shade. This will make the color pop.
- Sharp Edges: If the edges of your eyeshadow are too harsh, use a small amount of foundation or concealer on a clean brush to gently soften the perimeter.
- Boosting Eye Shape: To enhance your natural eye shape, tailor the placement of the dark shades. For example, if you have hooded eyes, focus the darker color slightly above the crease to ensure it’s visible.
By addressing these common issues and applying these corrective techniques, your halo eyes makeup will not only look more professional but also more striking and effective. Remember, practice makes perfect, and experimenting with different methods will help you find the best approach for your unique eye shape and style.
Halo Eyes for Different Eye Shapes and Skin Tones
The beauty of the halo eyes makeup technique lies in its versatility. It can be customized to enhance various eye shapes and complement different skin tones. This section provides recommendations for adapting the halo eye look to individual features, ensuring everyone can achieve this stunning makeup style.
Customizing the Halo Eye Technique for Individual Features
- For Round Eyes: Emphasize the top and bottom of your eyes with darker shades to elongate the shape. This creates a more balanced look with the central halo.
- For Almond Eyes: You have the ideal shape for halo eyes! Experiment with bold colors and shimmers to highlight your natural eye shape.
- For Hooded Eyes: Apply the darker shade slightly above the natural crease to ensure the halo effect is visible when your eyes are open.
- For Monolid Eyes: Focus on creating a gradient effect with the halo in the center to add depth and dimension to your eyes.
Recommendations for Various Eye Shapes and Skin Tones
- Light Skin Tones: Opt for soft pinks, taupes, and light browns. These shades complement your skin without overpowering it. For a pop of color, try a subtle gold or champagne in the center.
- Medium Skin Tones: Rich, warm shades like bronze, copper, or terracotta work beautifully. They enhance the natural warmth of your skin tone.
- Dark Skin Tones: Bold and vibrant colors look stunning. Deep plums, vibrant blues, or emerald greens create a striking contrast and bring out the warmth in your skin.
- Olive Skin Tones: Olive complexions can carry both warm and cool tones well. Experiment with rustic reds or cool blues to see what complements your undertone best.
By tailoring the halo eyes technique to your unique eye shape and skin tone, you can create a look that not only stands out but also enhances your natural beauty. Remember, makeup is an art form – feel free to experiment and find what works best for you.
Conclusion and Additional Resources
As we conclude our journey through the art of creating halo eyes, let’s recap the key points and explore additional resources for further learning and inspiration. This makeup technique, with its versatility and striking appearance, encourages individual creativity and personal style.
Recap of Key Points
- Foundation: Mastering halo eyes starts with understanding the basics – using the right tools and products, and practicing the fundamental steps.
- Customization: Adapt the technique to suit your unique eye shape and skin tone, making the look truly your own.
- Advanced Techniques: Experiment with different colors, textures, and additions like glitter or shimmer to elevate your halo eyes.
- Troubleshooting: Knowing how to correct common mistakes ensures your makeup looks polished and professional.
Further Learning and Inspiration Sources
- Tutorials and Videos: Platforms like YouTube offer a plethora of tutorials from makeup artists and enthusiasts, providing visual guides and creative ideas.
- Beauty Blogs and Articles: Stay updated with the latest trends and tips by following beauty blogs and reading articles on sites like Vogue.
- Social Media: Instagram and Pinterest are fantastic sources for inspiration. See how others are rocking their halo eyes and share your own creations.
Encouraging Creativity and Personal Style
- Experimentation is Key: Don’t be afraid to try new things. Makeup is a form of self-expression, so play around with different looks.
- Gather Inspiration: Look to fashion, nature, art, and even seasons for color and style inspiration.
- Share Your Looks: Join online communities or social media groups where you can share your makeup looks, get feedback, and be inspired by others.
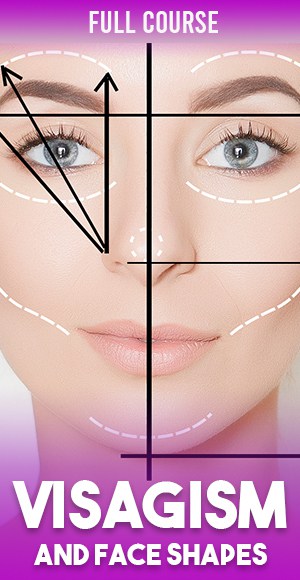
In summary, mastering halo eyes is about blending technique with creativity. Whether you’re a beginner or a seasoned makeup enthusiast, there’s always room to explore and enhance this captivating look. For those looking to deepen their understanding and skills, consider exploring Makeupflix, a streaming course makeup platform tailored for all levels of expertise. Remember, makeup is an art – there are no strict rules, only endless possibilities for expression and creativity.


